
Introduction
From now on every Floori user will be able to generate a floor by using the CAD Texture Generator. This tool generates the floor based on the texture of a particular color in a given size and format. If you’re looking to save time and abandon manually creating a floor using single tiles look no further!
Table of contents
- Log in to your account
- Choose color
- Select tile size
- Choose texture width
- Choose texture height
- Select pattern
- Select format
- Generate url link / Download
Manual
1. Log in to your account
Use your email and password to log into your Floori account. If you have forgotten the password, don’t worry – you can use the forgot password option beneath. If you need to recover your password you can also use https://portal.floori.io/recoverpassword.

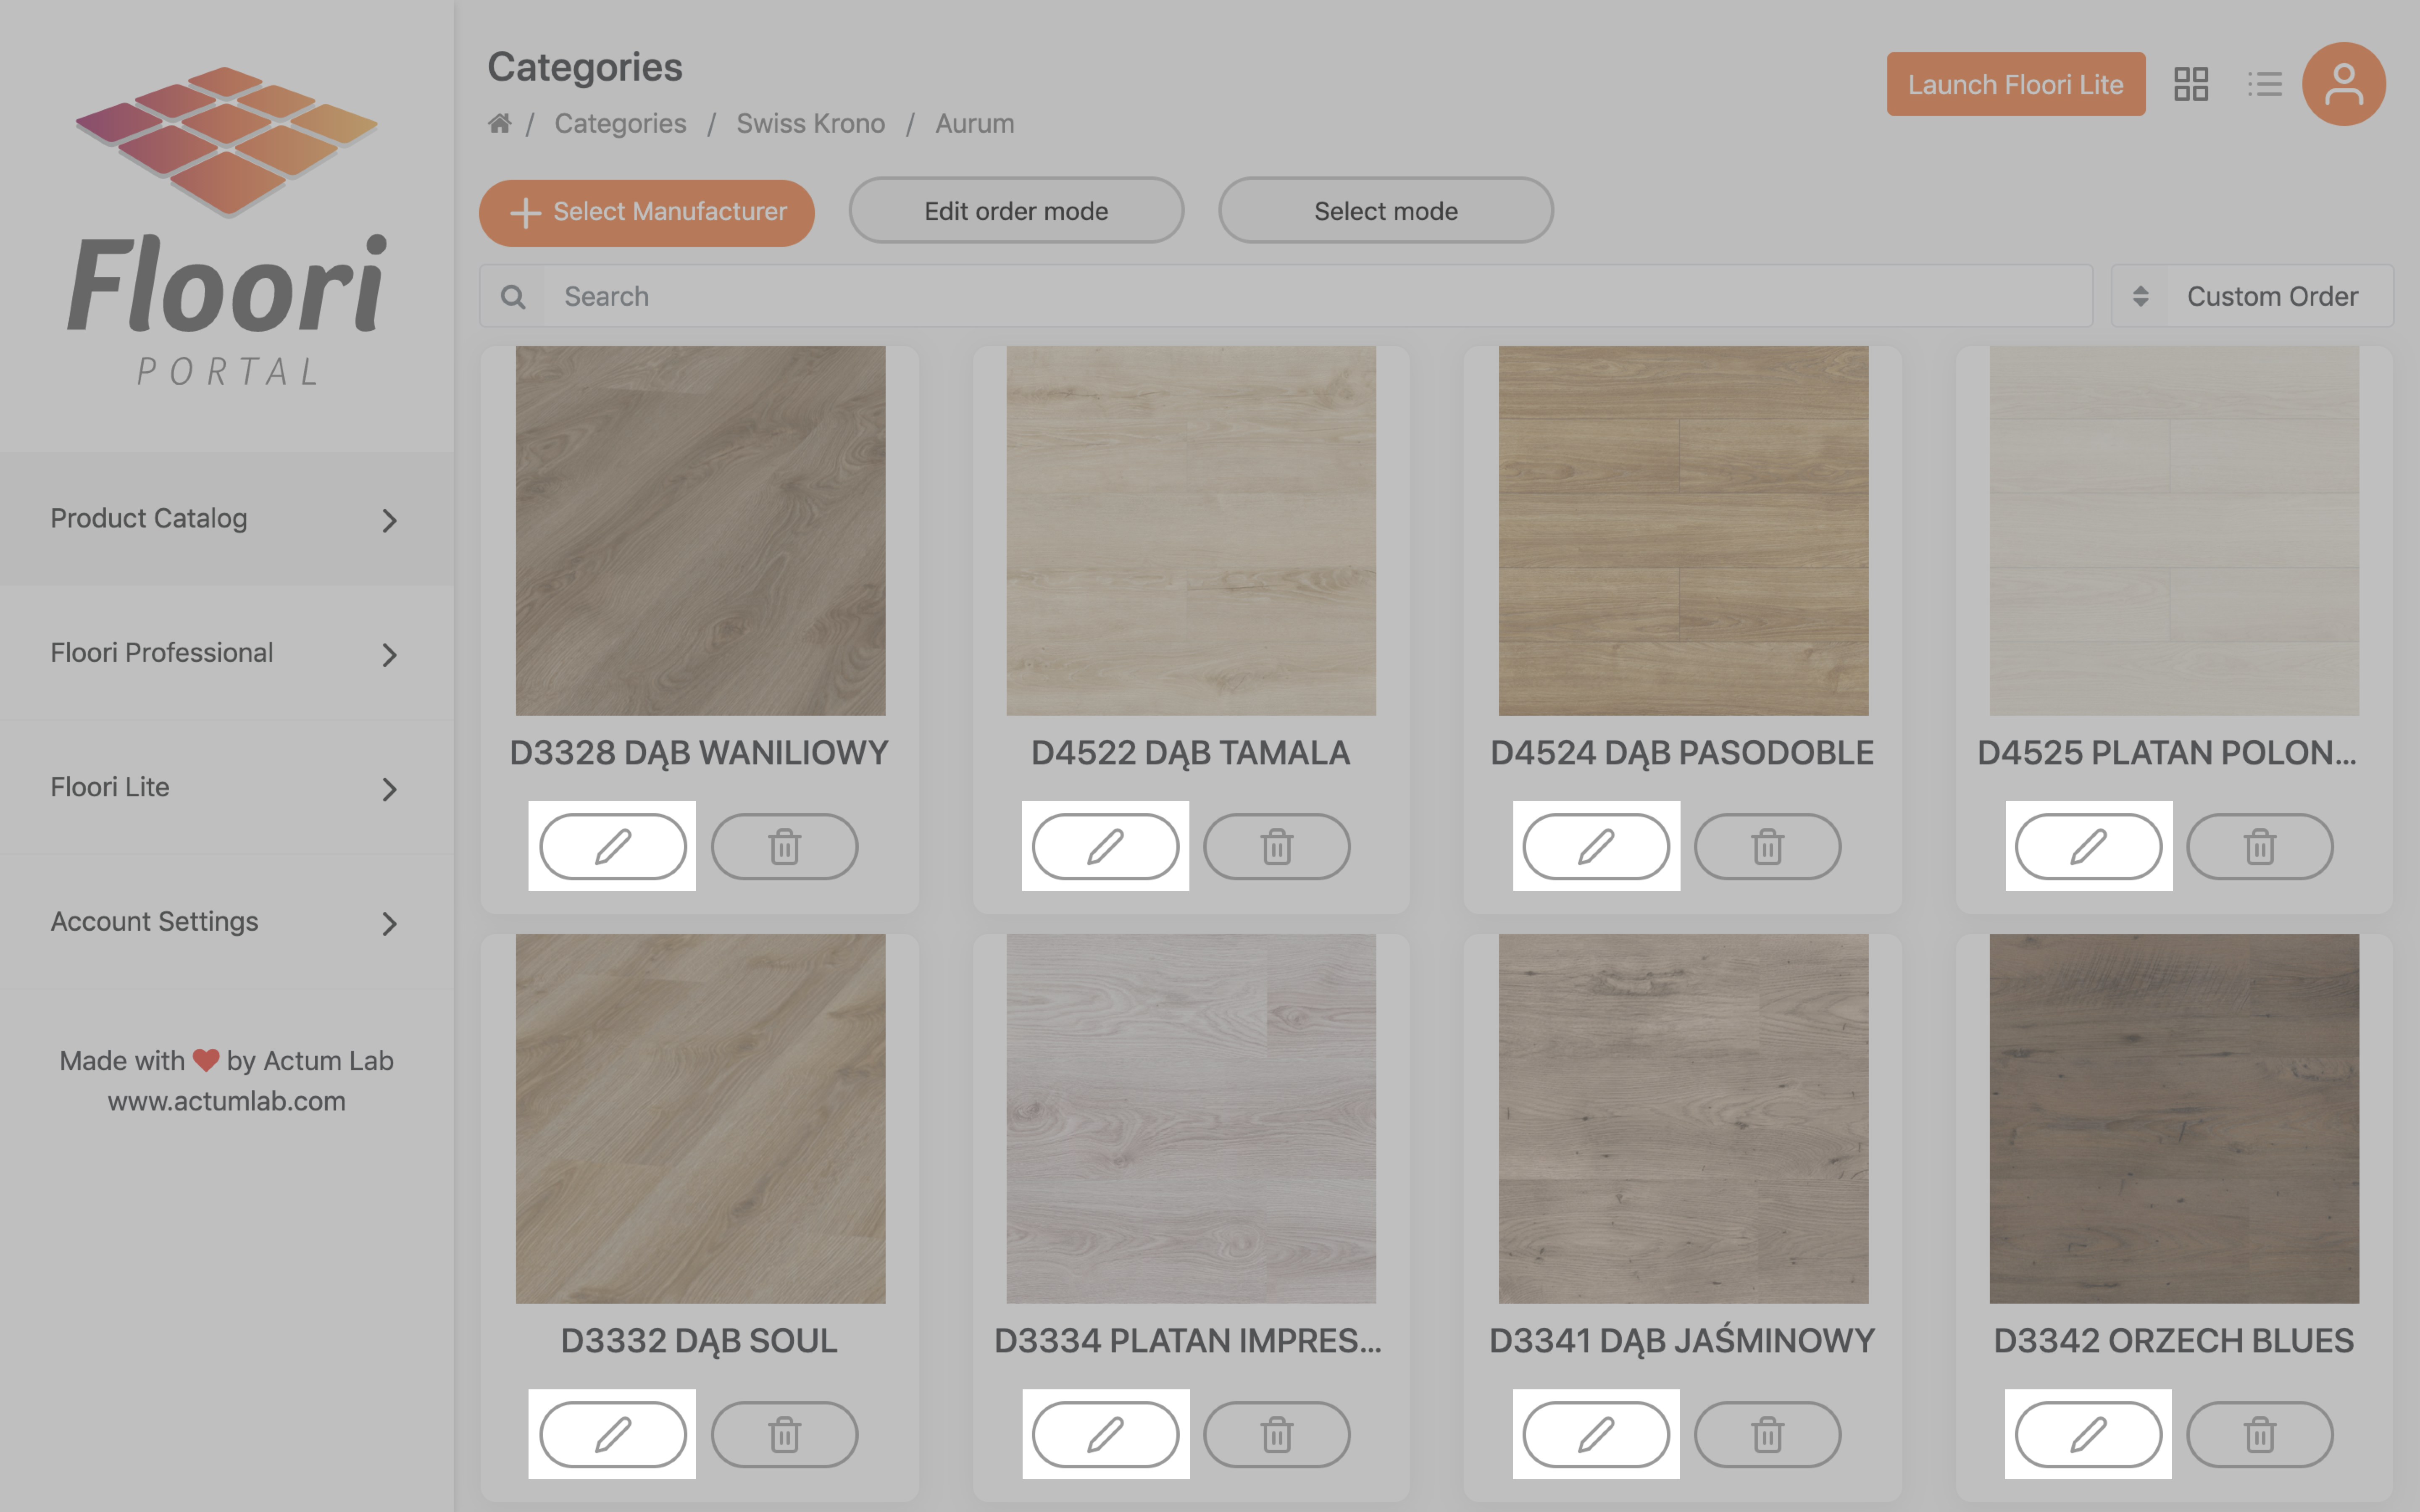
2. Choose color
To find the color you want navigate through manufacturers and categories.

When you find the floor, click edit (pencil icon). It highlights yellow when you hover over it.
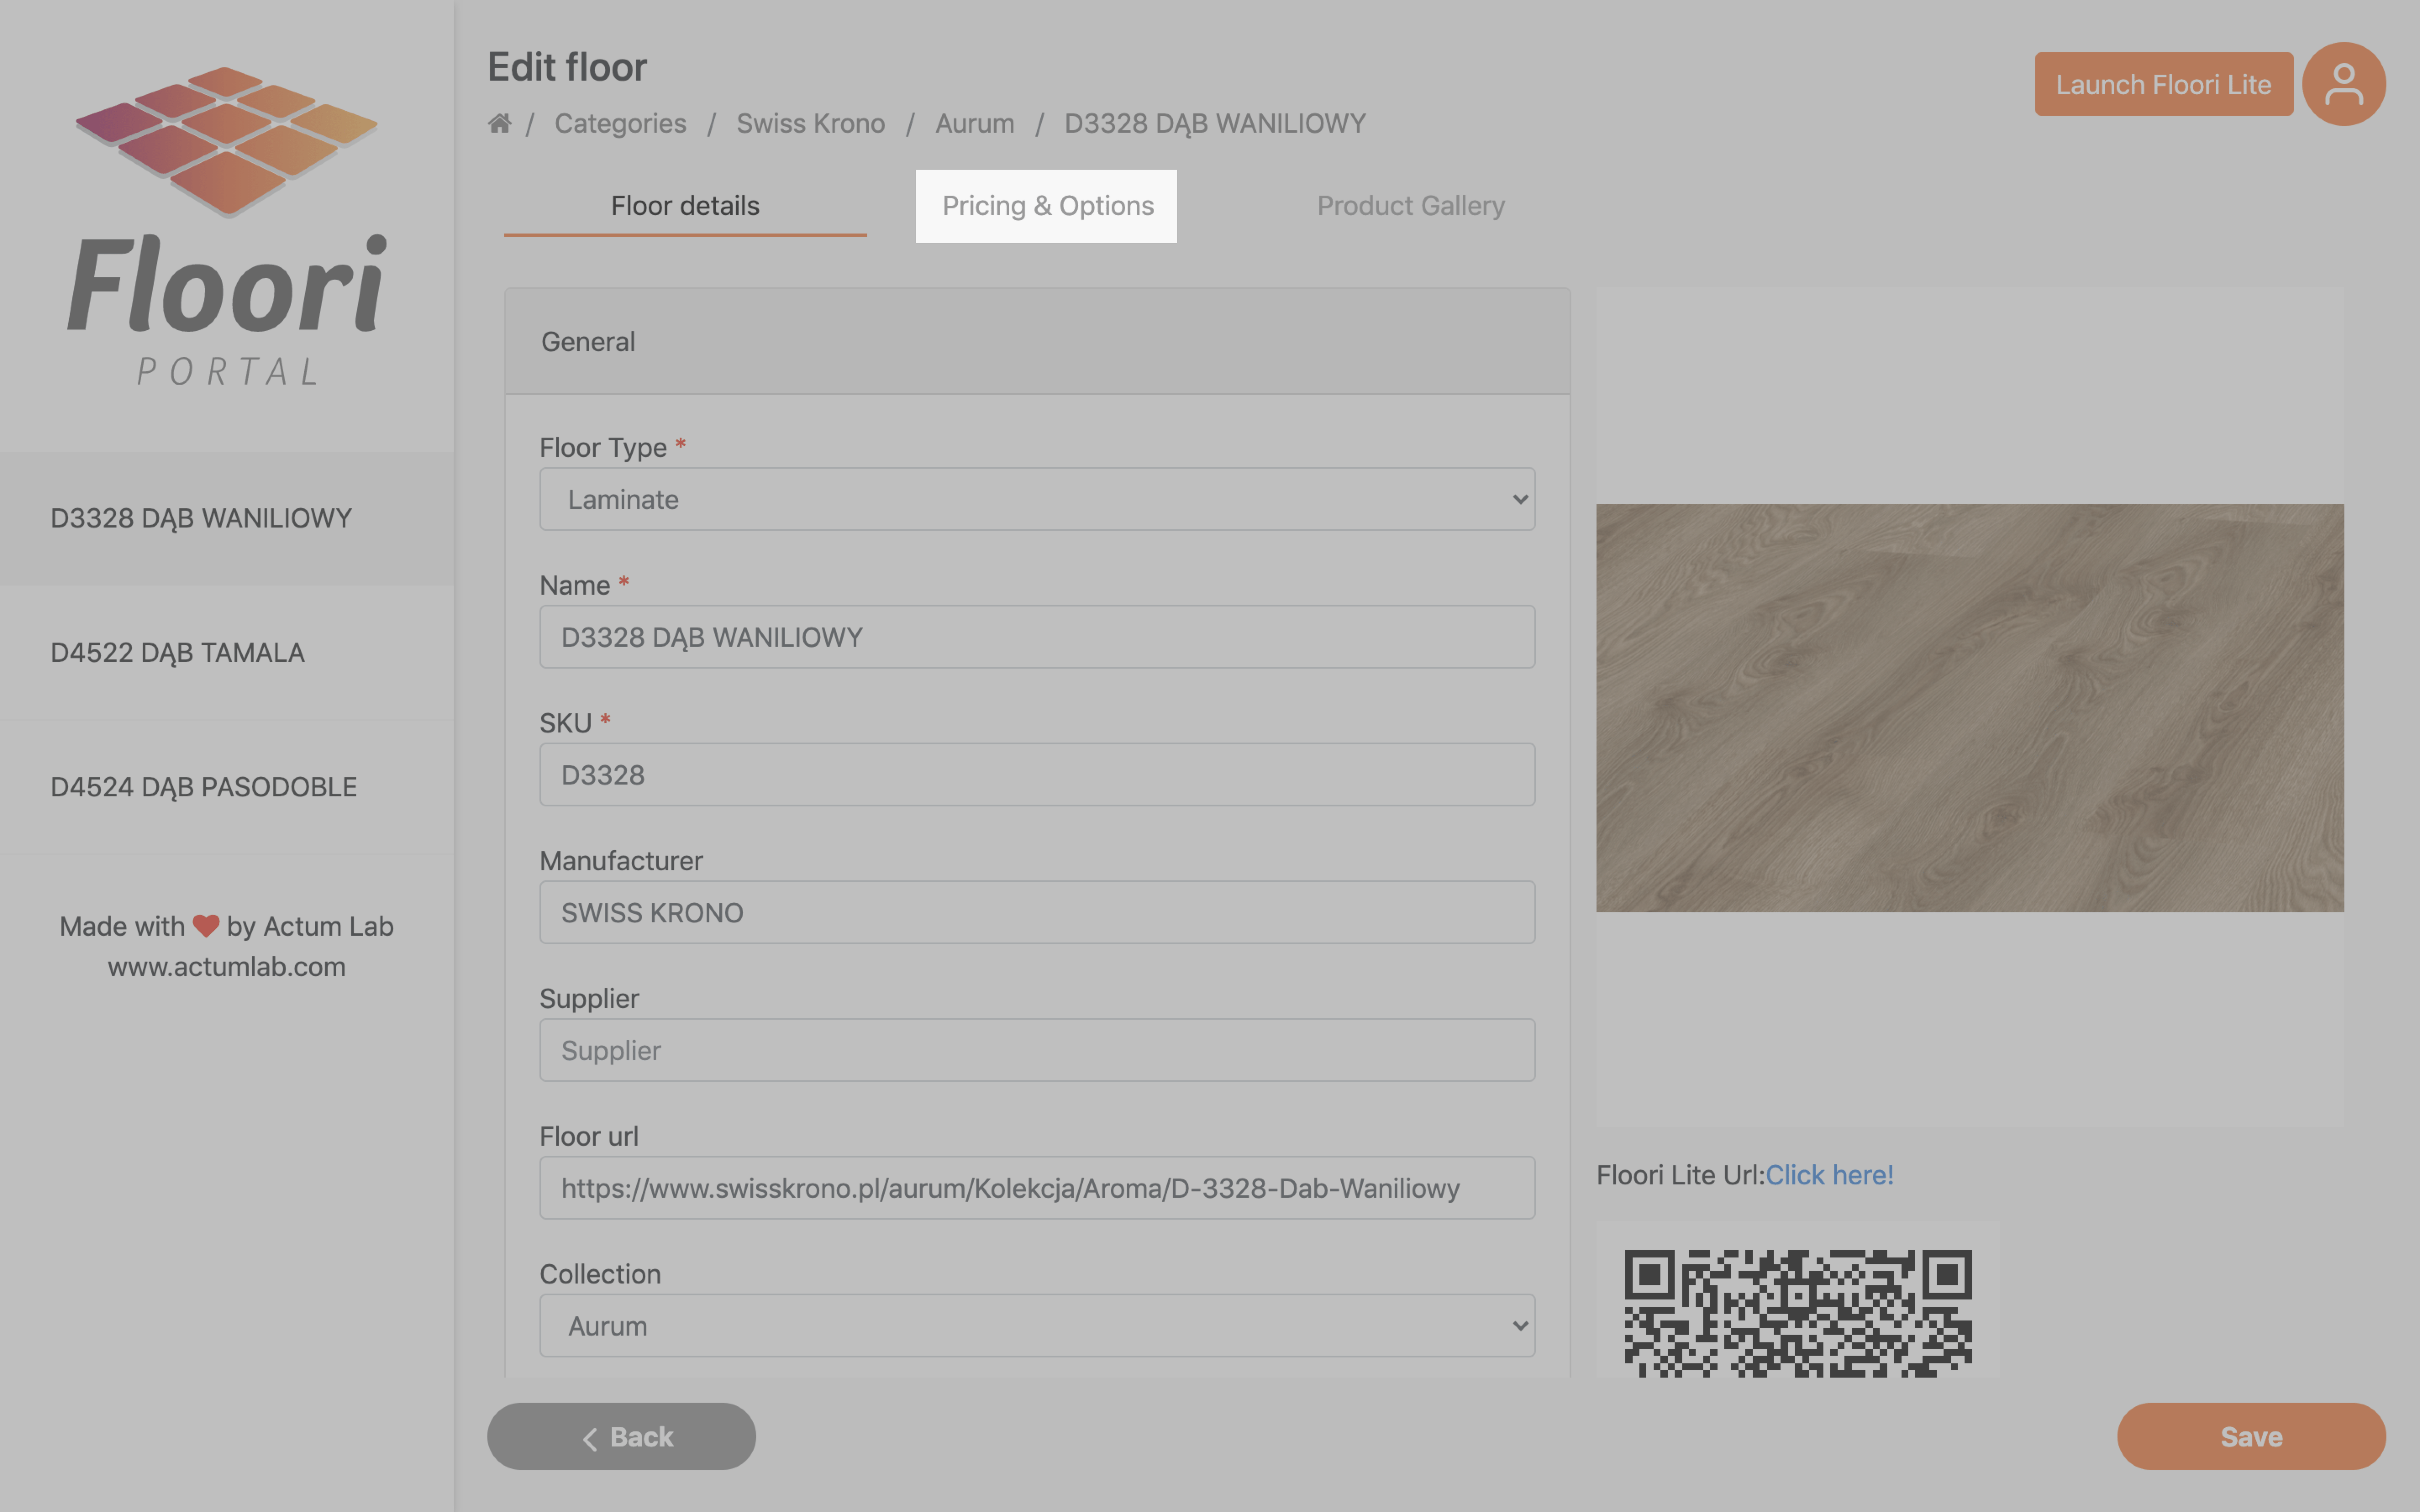
Now you’re editing floor. Choose the “Pricing & Options” tab.
Then choose the “CAD texture” button on the left side menu.
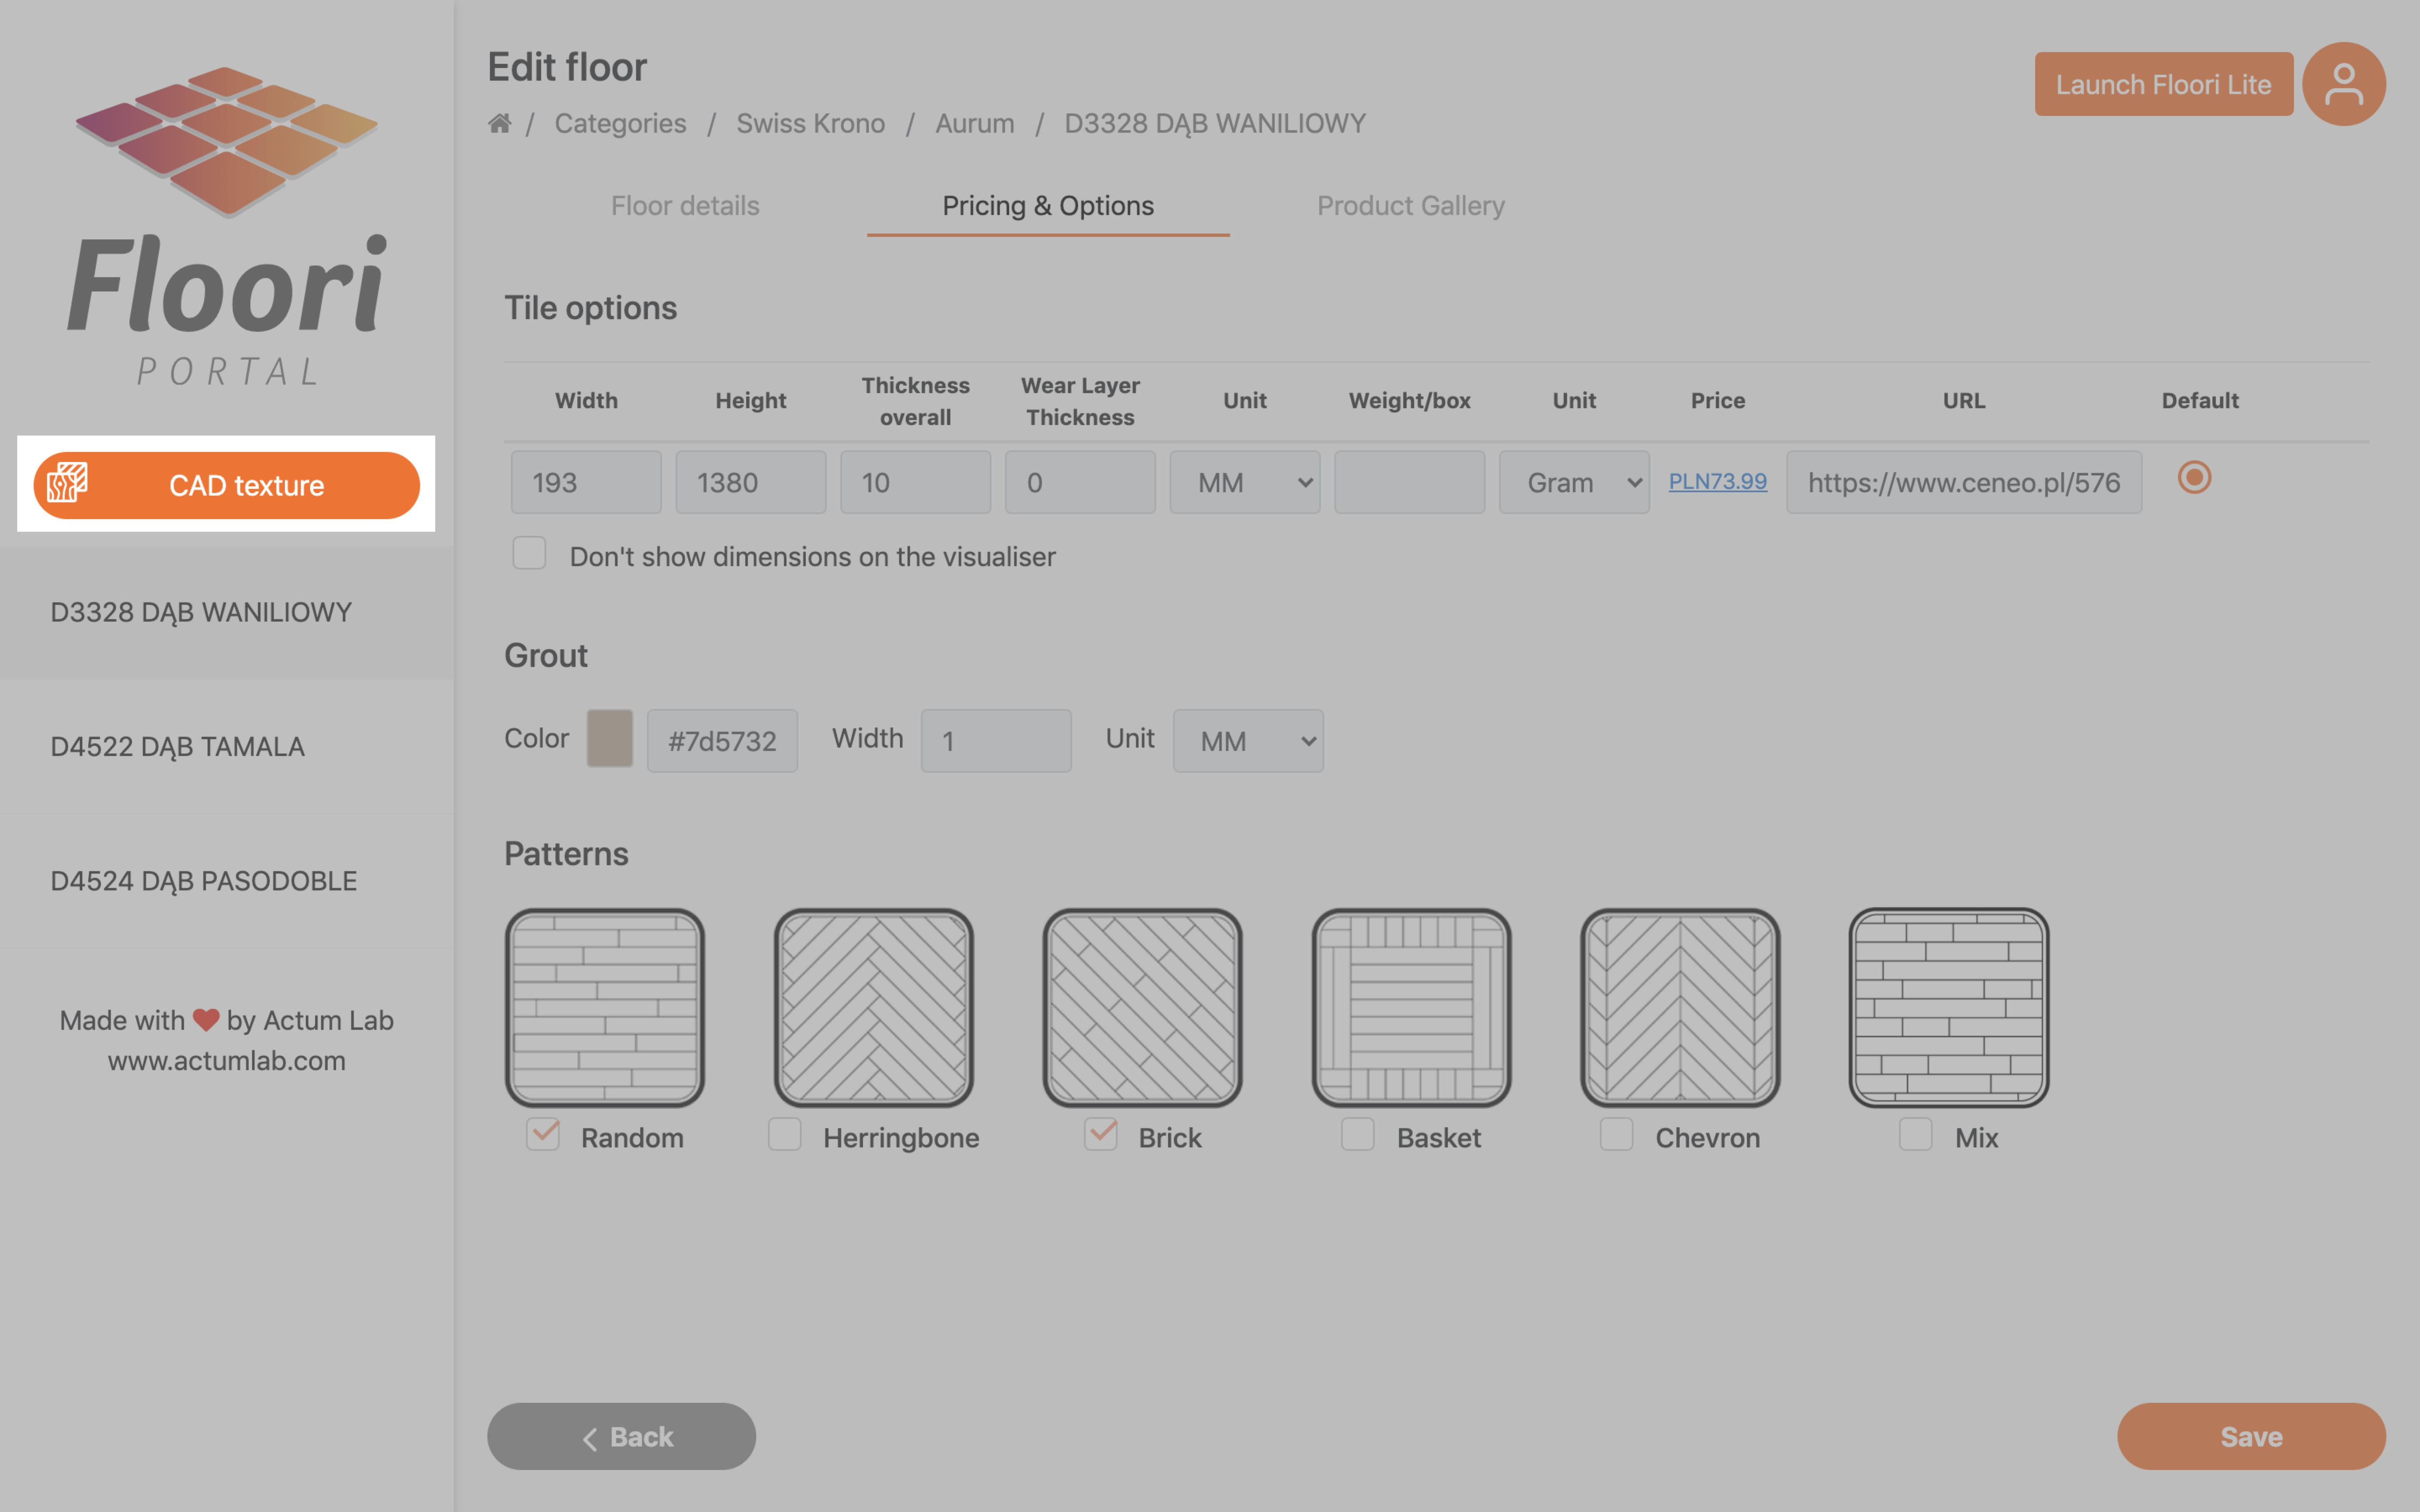
It will open up the CAD Texture generator.
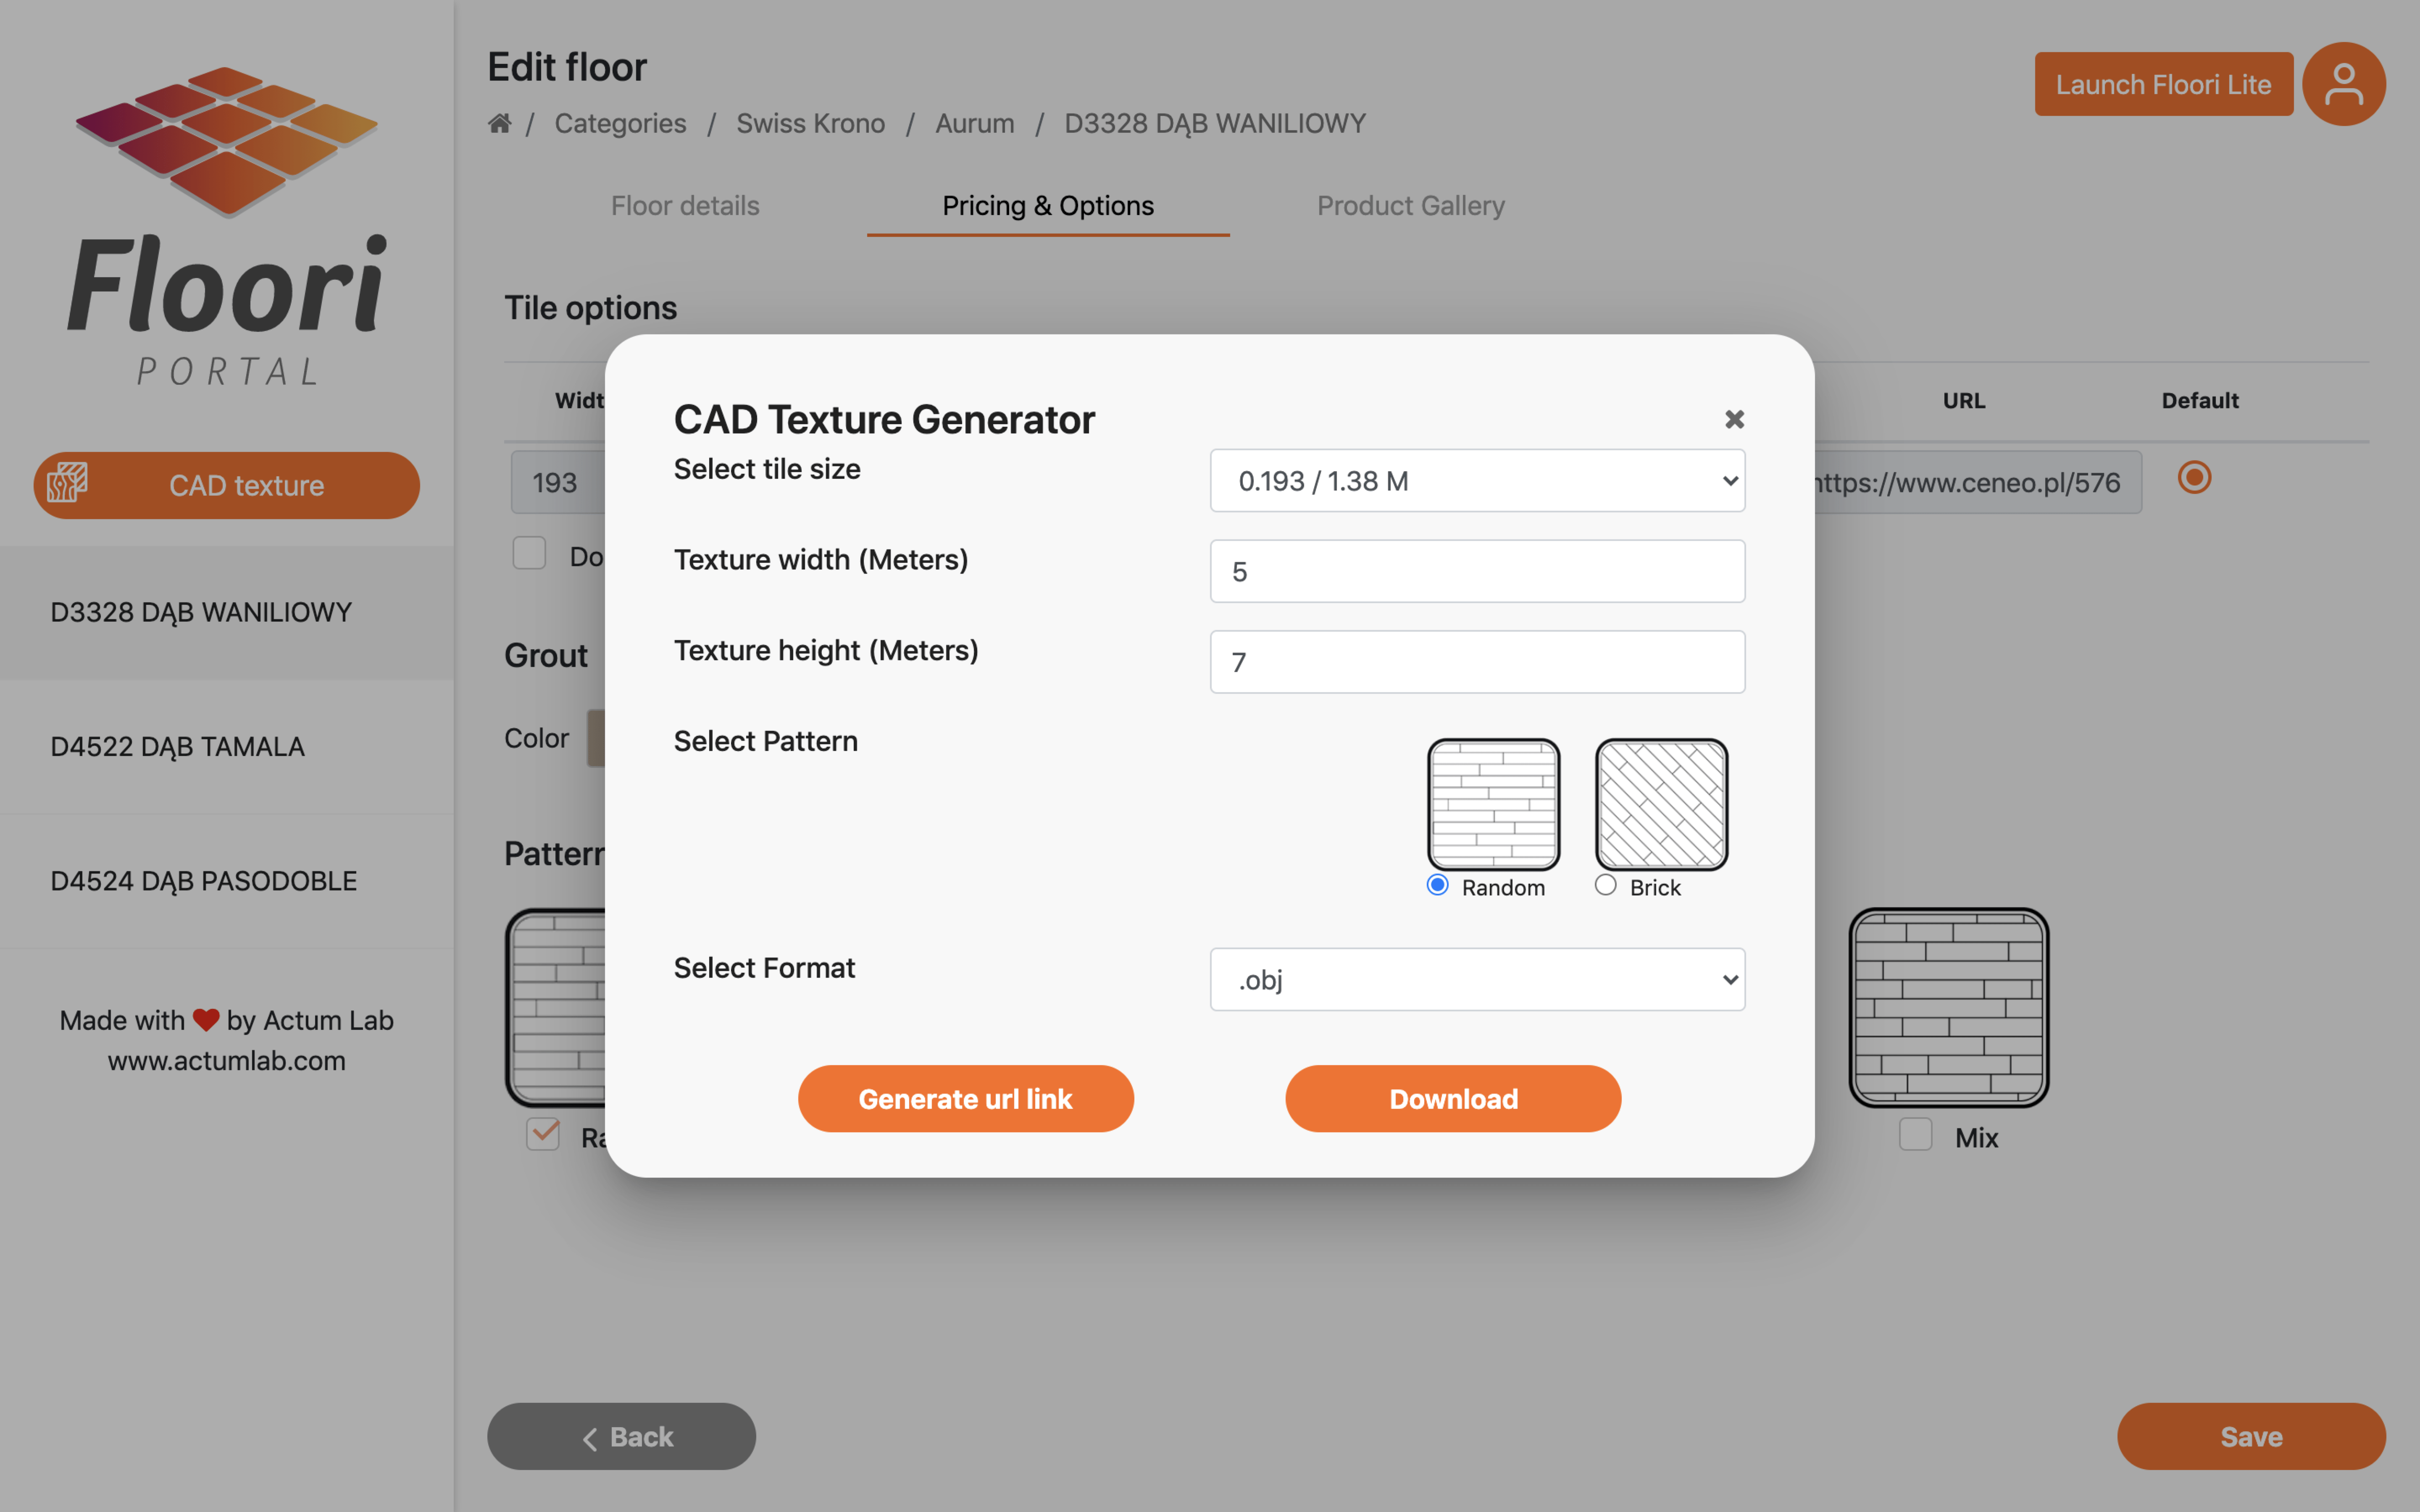
1. Select tile size
If the floor comes in more than one size, you’ll be able to choose the size you want from drop-down list, after clicking the arrow on the right side.

2. Choose texture width
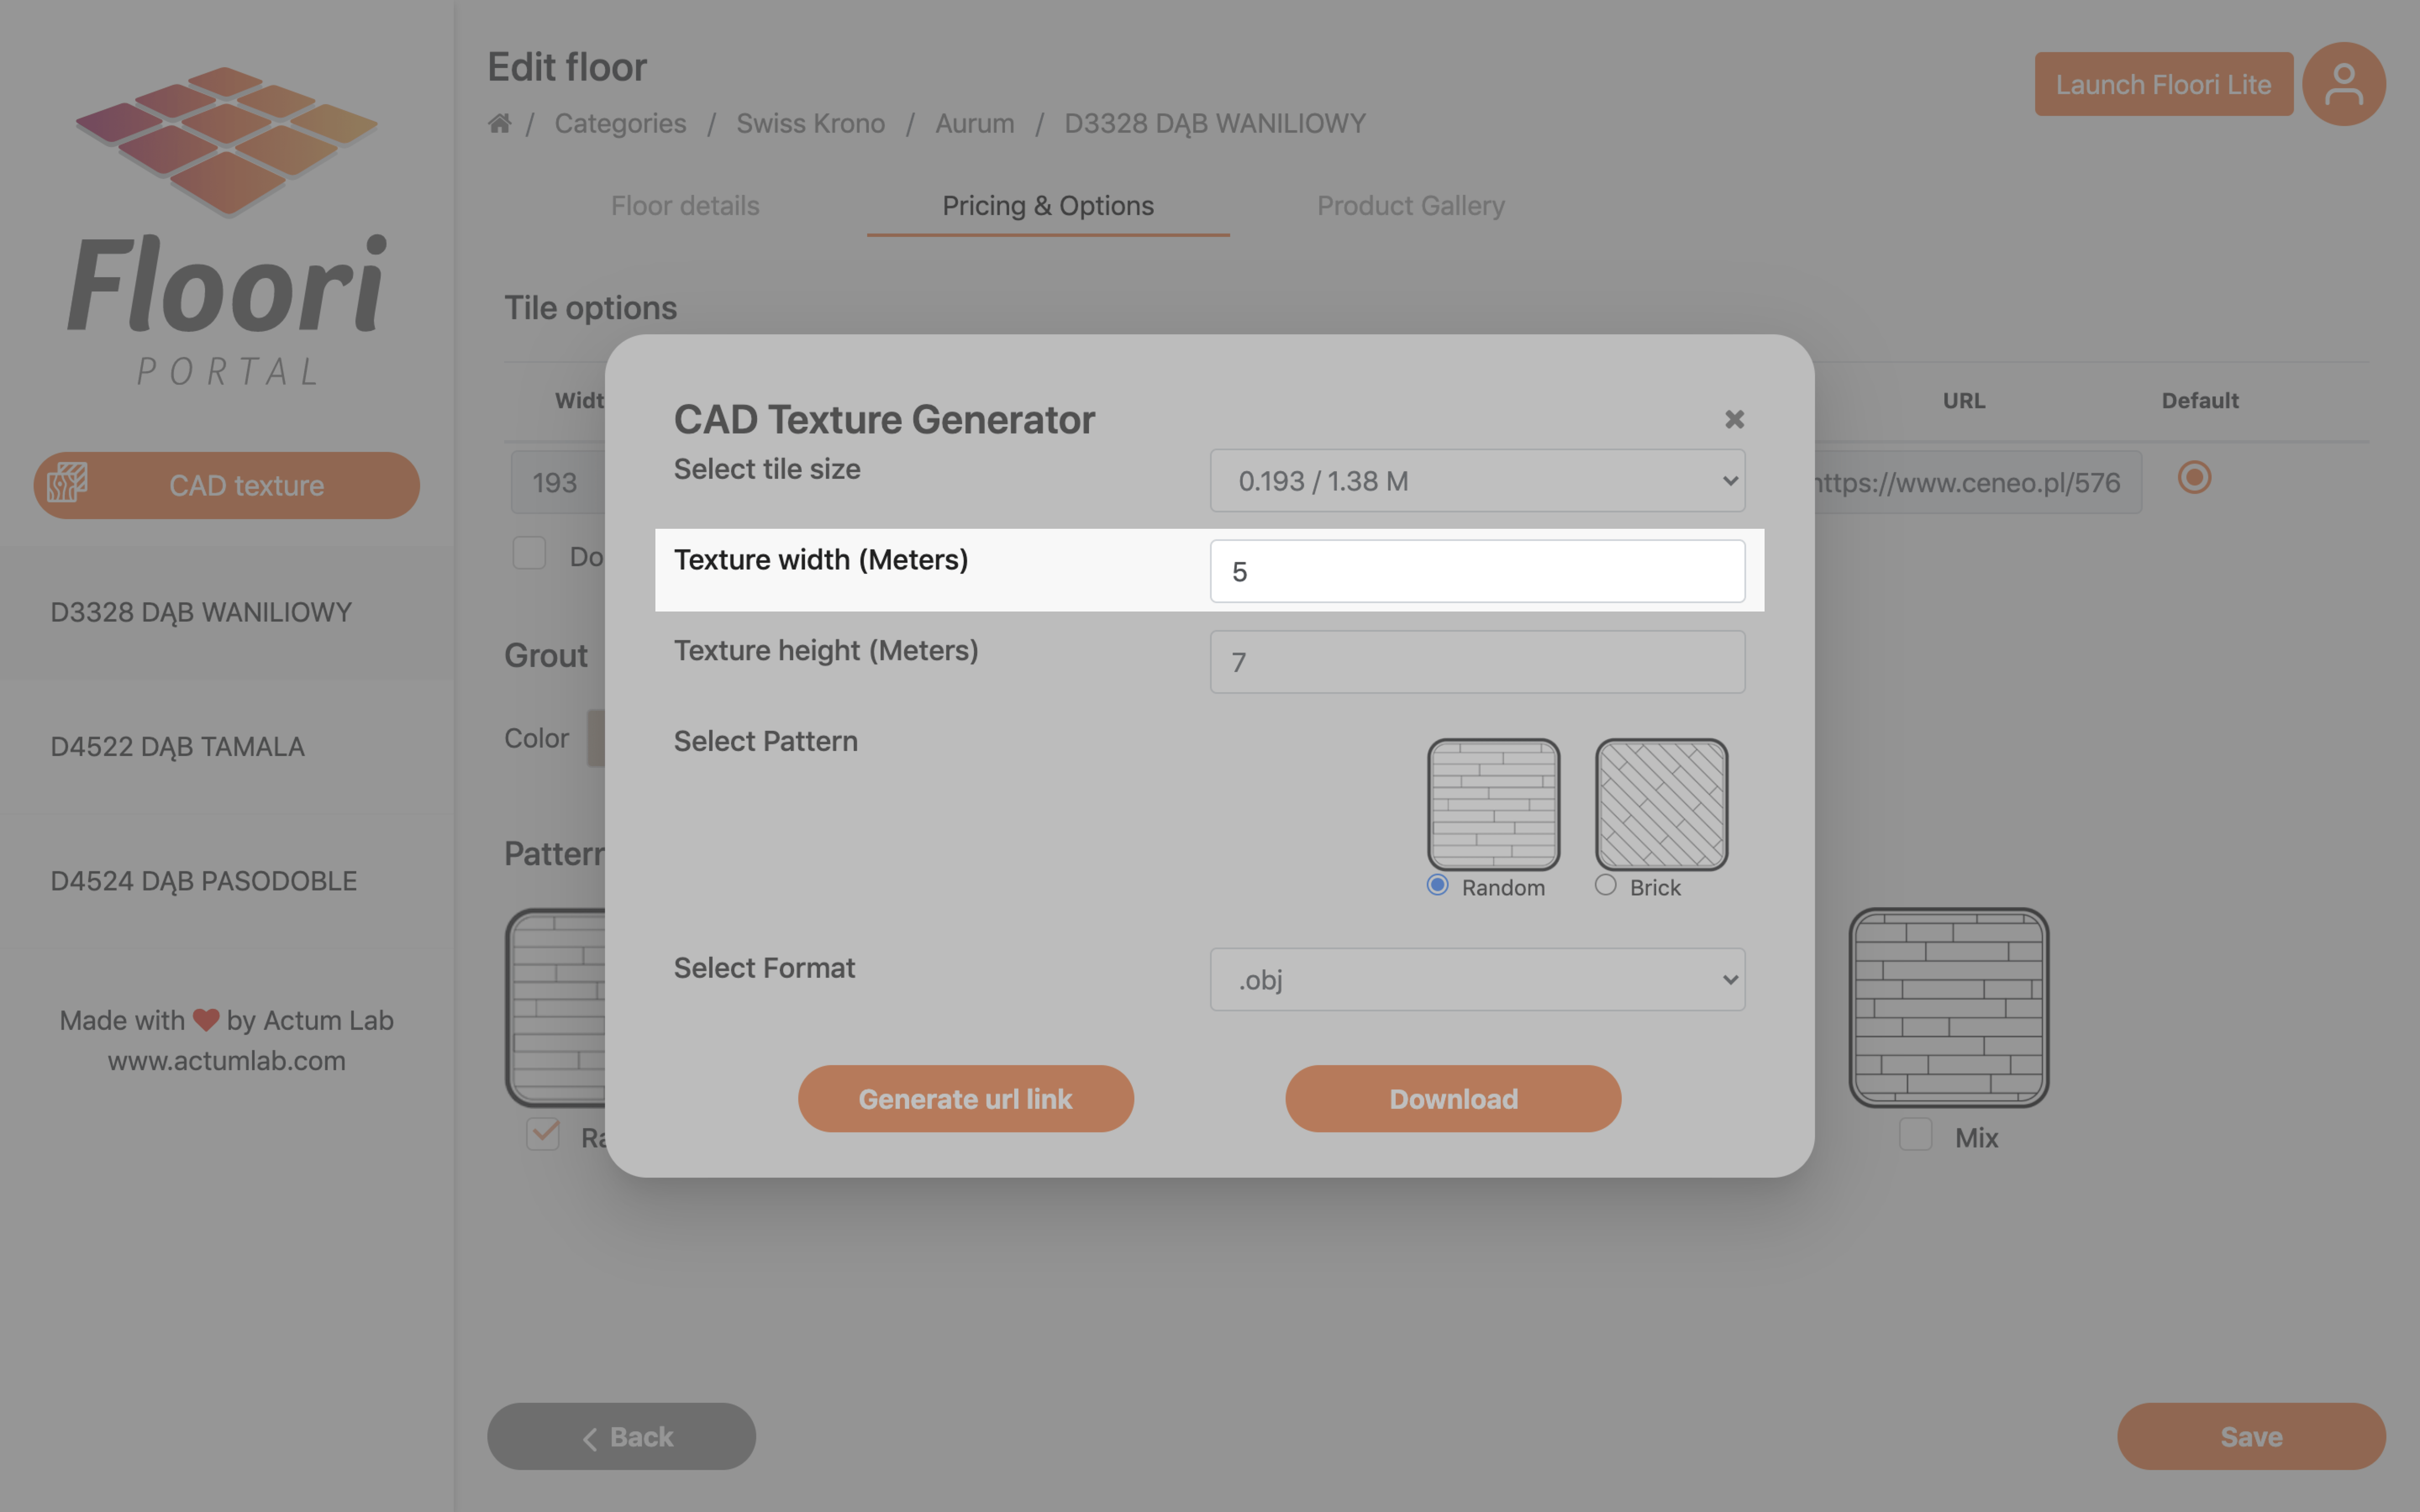
3. Choose texture height

4. Select pattern

5. Select format

Available formats are .obj, .gltf, .glb and .dae.

3. Generate url link / Download
After setting things up you’re ready to get the generated texture. You can download it directly or generate URL link.
To download directly click “Download button”.

It will give you an archive with everything you need.

If you want to generate URL click “Generate url link” button.

After some time (it can take few minutes) you should see a pop-up like this one below with the link.
Tip: Click two papers icon on the right to copy link to your clipboard.

Any questions? Feel free to contact us at Hello@Floori.io 🙂
Floori Ecosystem Part III: How the Floori Visualizer Enables Manufacturers and Distributors of Engineered Wood, Laminate, LVT/SPC, Parquet, and Vinyl to Drive Customer Confidence and Conversions
Part 3 of 3 — The Floori Ecosystem for Flooring Industry This article is part of our deep-dive into the Floori Ecosystem, which combines three parts that work
Floori Ecosystem Part II: How the Floori Portal Empowers Manufacturers and Distributors of Engineered Wood, Laminate, LVT/SPC, Parquet, and Vinyl to Control Catalogs, Branding, and Product Access
Part 2 of 3 — The Floori Ecosystem for Flooring Industry This article is part of our deep-dive into the Floori Ecosystem, which combines three parts that work
Floori Ecosystem Part I: How the Floori Scanner Helps Manufacturers and Distributors of Engineered Wood, Laminate, LVT/SPC, Parquet, and Vinyl Create True-to-Scale Digital Assets
Part 1 of 3 — The Floori Ecosystem for Flooring Industry This article is part of our deep-dive into the Floori Ecosystem, which combines three parts that work
Why Rug Brands Love Our WooCommerce Plugin (And Why You Will Too)
By Nagham, Floori’s Sales Manager In this article, Floori Sales Manager Nagham shares how the Floori WooCommerce Plugin is revolutionizing rug e-commerce. From real-time product

Introducing the Floori WooCommerce Plugin: Effortless Data Sync & Sales Optimization
We Listened. We Improved. Now, Managing Your WooCommerce Store and Floori Portal Is Easier Than Ever. E-commerce businesses rely on speed, accuracy, and efficiency to remain competitive. However, many

How These Two Companies Are Rocking It With The Best Performing Epoxy Ads (+ How You Can Do It Too)
In today’s digital age, social media has become an essential platform for businesses to reach and engage with their target audience. One of the critical factors in achieving success